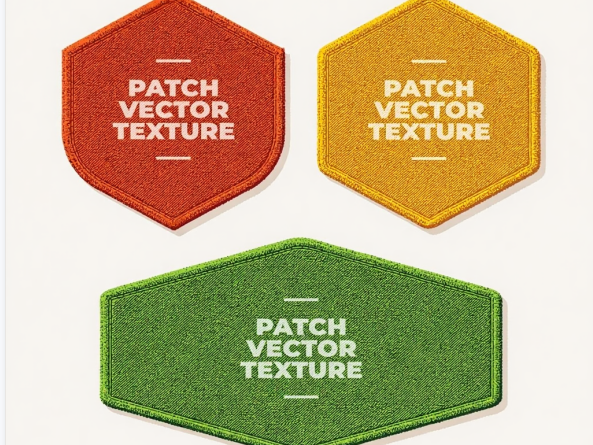
How to Make Machine Embroidery Patches: A Complete Step-by-Step Guide
Machine embroidery patches are decorative designs stitched onto fabric with a durable backing. They’re perfect for branding, personalizing items, or artistic expression.
Whether you’re customizing clothing or creating professional-quality patches for your business, learning this skill is incredibly rewarding.
Why Should You Make Machine Embroidery Patches?
Machine embroidery patches offer a cost-effective way to add personality to uniforms, team gear, and promotional materials.
With the right tools and techniques from professional digitizing services, you can produce high-quality patches at home or in your shop.
Essential Tools & Materials You’ll Need
Before starting, gather these materials:
- Embroidery machine with multiple thread options
- Polyester or rayon embroidery thread for vibrant colors
- Base fabric like twill, felt, or canvas
- Stabilizer: Cut-away for dense designs, tear-away for lighter ones
- Backing adhesive such as Heat-n-Bond
- Sharp embroidery scissors
- Design software for creating embroidery designs
The Complete Step-by-Step Process
1) Design Your Patch
Start by creating or modifying your design using embroidery software.
When working with custom embroidery digitizing for branding, ensure all elements are properly placed during digitization.
A satin border (2.2–3.0 mm) or merrow edge will give your patch a clean, professional look after trimming.
Pro Tip: Always test your design on scrap fabric first to catch any stitching issues.
2) Prepare the Fabric
Cut your base fabric to size, leaving extra room around the edges.
Stabilize the fabric to prevent puckering or movement during embroidery. You can hoop the fabric with stabilizer or use sticky stabilizer.
Pro Tip: Use cut-away stabilizer for heavier designs—this is especially important for jacket back digitizing projects.
3) Load and Align the Design
Transfer your design to the embroidery machine and place the fabric into the hoop. Make sure it’s taut and centered.
Check alignment carefully before stitching. When working on specific placements like left chest digitizing, precision is crucial.
Pro Tip: Use your machine’s alignment tools for best results.
4) Start the Embroidery
Let your machine work through the design while monitoring for thread breaks.
Select thread colors that complement your design. This is where techniques like 3D puff embroidery digitizing can add dimensional interest.
Pro Tip: Watch for jump stitches and reduce jump stitches in digitizing by trimming them as you go.
5) Trim and Finish the Patch
Once stitching is complete, carefully remove the fabric from the hoop.
Trim any excess stabilizer, leaving a thin margin around the design. Clean up loose threads for a professional finish.
6) Add Backing
Apply Heat-n-Bond or similar adhesive to the back of your patch. Follow the manufacturer’s instructions for proper bonding.
Pro Tip: For removable options, consider using Velcro® or sew-on backings.
7) Cut the Patch
Use sharp scissors or an applique cutter to trim around the embroidered design.
Take your time to avoid cutting into the stitches, and leave a small border for durability.
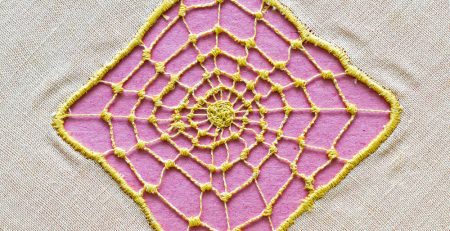
Machine Embroidery Patch Finishing Options
Several finishing methods can elevate your patches:
Satin Edge: A quick edging method that provides a neat, professional appearance.
Merrow Edge: This thick, rope-like border is ideal for larger, round, or oval patches.
Laser Cut: Perfect for crisp, clean shapes, especially with intricate designs.
Pro Tip: For commercial patches, add a heat-seal backing for easy customer application.
Expert Tips from Unique Digitize
At Unique Digitize, we handle patch production daily. Here are proven tips:
Use polyester thread for uniforms and branded items—it’s UV-resistant and durable.
Perfect your underlays: Use edge-run + zigzag underlay for borders and center/contour underlay for fill stitches. This prevents fabric shifting.
Choose the right stabilizer based on fabric type and design density. When comparing embroidery digitizing services, ask about their stabilizer recommendations.
Common Mistakes to Avoid
Fabric puckers or wrinkles: Check tension settings and use heavier stabilizer.
Fraying edges: Increase your satin border to 2.4mm or wider.
Gaps in borders: Set pull compensation to +0.2–0.4 mm to prevent gaps.
Why Make Your Own Machine Embroidery Patches?
Creating machine embroidery patches opens up endless possibilities:
Business branding: Create patches for promotional materials and products.
Team customization: Personalize uniforms for clubs and teams, especially with cap embroidery techniques.
Unique gifts: Handmade patches make thoughtful, personalized presents.
Specialized applications: Explore unique textures with towel digitizing services.
Frequently Asked Questions
What fabric is best for making patches?
Twill, felt, and canvas are ideal choices as they provide the durability needed for quality stitching.
Which stabilizer should I use?
Use cut-away stabilizer for heavier designs to prevent stretching, and tear-away stabilizer for lighter designs.
Can I make iron-on patches without a heat press?
Yes, a household iron works, though a heat press provides more consistent pressure and better results.
What is a satin border?
A satin border is stitching that runs along your design’s edge to prevent fraying and create a polished look.
How do I get a merrow edge?
You’ll need an overlock machine or can send patches to a finishing shop. It’s perfect for round or oval patches.
Ready to Create Professional Patches?
Making machine embroidery patches is a fun, creative, and practical skill.
Understanding proper select placement for embroidery on shirts and other garments ensures professional results.
At Unique Digitize, we specialize in custom digitizing services and can help bring your patch designs to life.
Our team understands the nuances of quality patch production, from initial design to final finishing.
Want expert help with your patch projects? Contact Unique Digitize for professional digitizing and production services. We’re here to help you create patches that stand out!


Leave a Reply